Ad meliora

Aug 01, 2023

Deploying the blog

OUTLINE

INTRODUCTION

This blog is built with Pelican. Pelican is a python blog generator with no bells and whistles. So the way I normally deploy new blog entries is to:

  1. add the new blog entries to git
  2. push the commit from (1) to remote
  3. ssh into the box where the blog is
  4. pull down the commit from (2)
  5. regenerate the blog html
  6. copy over the blog html from (5) to the location where the webserver(Nginx) serves the blog.

I wanted to automate this using my new Gitea and Woodpecker CI Instance. First, I had to push the code to the Gitea instance. Second, I had to write a pipeline that could build the code and run the steps the outlined above.

PUSHING REPO TO THE GITEA INSTANCE

  1. Created an empty repo with the same name (iratusmachina) on the Gitea UI interface

  2. Pulled down the empty repo (remote) to my local

    $ git clone https://git.iratusmachina.com/iratusmachina/iratusmachina.git

  3. Added new remote

    $ git remote add gitea <remore-url_from-(1)>

  4. Pushed to new remote

    $ git push -u gitea <main-branch>

A (NOT-SO) BRIEF EXPLAINER ABOUT SSH

Deploying the blog has increased my knowledge about SSH. Much more than below is described here

Basically to communicate to a shell on a remote box securely, one would use SSH. After connecting to that shell, commands can be sent using SSH to the remote shell to execute commands on the remote host.

So SSH is based on the client-server model, the server program running on the remote host and the client running on the local host (user's system). The server listens for connections on a specific network port, authenticates connection requests, and spawns the appropriate environment if the client on the user's system provides the correct credentials.

Generally to authenticate, public-key/asymmetric cryptography is used, where there is a public and a private key. In SSH, encryption can be done with one of the keys and the decryption would be done with the other key. In SSH, the private and public keys reside on the client while the public key resides on the server.

To generate the public/private key pair, one would run the command

$ ssh-keygen -t ed25519 -C "your_email@example.com" # Here you can use a passpharse to further secure the keys
...
Output
Your identification has been saved in /root/.ssh/id_ed25519.
Your public key has been saved in /root/.ssh/id_ed25519.pub.
...

Then the user could manually copy the public key to the server, that is, append it to this file ~/.ssh/authorized_keys, if the user is already logged into the server. This file is respected by SSH only if it is not writable by anything apart from the owner and root (600 or rw-------). If the user is not logged into the remote server, this command can be used instead

$ ssh-copy-id username@remote_host # ssh-copy-id has to be installed on remote_host
OR
$ cat ~/.ssh/id_ed25519.pub | ssh username@remote_host "mkdir -p ~/.ssh && cat >> ~/.ssh/authorized_keys" # use if ssh-copy-id is not installed on remote-host

Then when you log in, the following sequence of events takes place.

  1. The SSH client on the local (user's computer) requests SSH-Key based authentication from the server program on the remote host.
  2. The server program on the remote host looks up the user's public SSH Key from the whitelist file ~/.ssh/authorized_keys.
  3. The server program on the remote host then creates a challenge (a random string)
  4. The server program on the remote host encrypts the challenge using the retrieved. public key from (3). This encrypted challenge can only be decrypted with the associated private key.
  5. The server program on the remote host sends this encrypted challenge to the client on the local (user's computer) to test whether they actually have the associated private key.
  6. The client on the local (user's computer) decrypts the encrypted challenge from (5) with your private key.
  7. The client on the local (user's computer) prepares a response and encrypts the response with the user's private key and sends it to the server program on the remote host.
  8. The to the server program on the remote host receives the encrypted response and decrypts it with the public key from (2). If the challenge matches, this proves that, the client on the local (user's computer), trying to connecf from (1), has the correct private key.

If the private SSH key has a passphrase (to improve security), a prompt would appear to enter the passphrase every time the private SSH key is used, to connect to a remote host.

An SSH agent helps to avoid having to repeatedly do this. This small utility stores the private key after the passpharse has been entered for the first time. It will be available for the duration of user's terminal session, allowing the user to connect in the future without re-entering the passphrase. This is also important if the SSH credentials need to be forwarded. The SSH agent never hands these keys to client programs, but merely presents a socket over which clients can send it data and over which it responds with signed data. A side benefit of this is that the user can use their private key even with programs that the user doesn't fully trust

To start the SSH agent, run this command:

$ eval $(ssh-agent)
Agent pid <number>

Why do we need to use eval instead of just ssh-agent? SSH needs two things in order to use ssh-agent: an ssh-agent instance running in the background, and an environment variable (SSH_AUTH_SOCK) that tells path of the unix file socket that the agent uses for communication with other processes. If you just run ssh-agent, then the agent will start, but SSH will have no idea where to find it.

After that, the private key can then be added to the ssh-agent so that it cann manage the key using this command

$ ssh-add ~/.ssh/id_ed25519

After this, the user can verify that a connection can be made to the remote/server using this command (if the user has not done so before):

$ ssh username@remote_host
...
The authenticity of host '<remote_host> (<remote_host_ip>)' can't be established.
ECDSA key fingerprint is SHA256:OzvpQxRUzSfV9F/ECMXbQ7B7zbK0aTngrhFCBUno65c.
Are you sure you want to continue connecting (yes/no)?

If the user types yes, the SSH client writes the host public key to the known_hosts file ~/.ssh/known_hosts and won’t prompt the user again on the subsequent SSH connections to the remote_host. If the user doesn’t type yes, the connection to the remote_host is prevented. This interactive method allows for server verification to prevent man-in-the-middle attacks

So if you wanted to automate this process: User interaction is essentially limited during automation (CI). So to So another way of testing the connection would be to use the ssh-keyscan utility as shown below:

$ ssh-keyscan -H <remote_host> >> ~/.ssh/known_hosts

The command above adds all the <remote_host> public keys and hashes of the hostnames of the public keys to the known_hosts file. Essentially ssh-keyscan just automates the process of retrieving the public key of the remote_host for inclusion in the known_hosts file without actually logging into the server.

So to run commands on the remote host through ssh, the user can run this command:

$ ssh -o StrictHostKeyChecking=no -i ~/.ssh/id_ed25519 <remote-host>@<remote-host-ip> "<command>"

The StrictHostKeyChecking=no tells the SSH client on the local (user's computer) to trust the <remote-host> key and continue connecting. The -i is used because we are not using the `ssh-agent- to manage the private key and so will have to tell the SSH client on the local (user's computer) where our private key is located.

WRITING THE PIPELINE YML

So I followed in the instructions here. So the general pipeline syntax for 0.15.x is:

pipeline:
  <step-name-1>:
    image: <image-name of container where the commands witll be run>
    commands:
      - <First-command>
      - <Second-command>
    secrets: [ <secret-1>, ... ]
    when:
      event: [ <events from push, pull_request, tag, deployment, cron, manual> ]
      branch: <your branch>
  <step-name-2>:
        ...

The commands are run as a shell script. So the commands are run with this command-line approximation:

$ docker run --entrypoint=build.sh <image-name of container where the commands witll be run>

The when section is a set of conditions. The when section is normally attached to a stage or a pipeline. If the when section is attached to a stage and the set of conditions of the when section are satisfied, then the commands belonging to that stage are run. The same applies for a pipeline.

The final pipeline is shown below:

pipeline:
  build:
    image: python:3.11-slim
    commands:
      - apt-get update
      - apt-get install -y --no-install-recommends build-essential gcc make rsync openssh-client && apt-mark auto build-essential gcc make rsync openssh-client
      - command -v ssh
      - mkdir -p ~/.ssh
      - chmod 700 ~/.ssh
      - echo "$${BLOG_HOST_SSH_PRIVATE_KEY}" > ~/.ssh/bloghost
      - echo "$${BLOG_HOST_SSH_PUBLIC_KEY}" > ~/.ssh/bloghost.pub
      - chmod 600 ~/.ssh/bloghost
      - chmod 600 ~/.ssh/bloghost.pub
      - ssh-keyscan -H $${BLOG_HOST_IP_ADDR} >> ~/.ssh/known_hosts
      - ls -lh ~/.ssh
      - cat ~/.ssh/known_hosts
      - python -m venv /opt/venv
      - export PATH="/opt/venv/bin:$${PATH}"
      - export PYTHONDONTWRITEBYTECODE="1"
      - export PYTHONUNBUFFERED="1"
      - echo $PATH
      - ls -lh
      - pip install --no-cache-dir -r requirements.txt
      - make publish
      - ls output
      - rsync output/ -Pav -e "ssh -o StrictHostKeyChecking=no -i ~/.ssh/bloghost" $${BLOG_HOST_SSH_USER}@$${BLOG_HOST_IP_ADDR}:/home/$${BLOG_HOST_SSH_USER}/contoutput
      - ssh -o StrictHostKeyChecking=no -i ~/.ssh/bloghost $${BLOG_HOST_SSH_USER}@$${BLOG_HOST_IP_ADDR} "cd ~; sudo cp -r contoutput/. /var/www/iratusmachina.com/"
      - rm -rf ~/.ssh
    secrets: [ blog_host_ssh_private_key, blog_host_ip_addr, blog_host_ssh_user, blog_host_ssh_public_key ]
    when:
      event: [ push ]
      branch: main

OBSERVATIONS

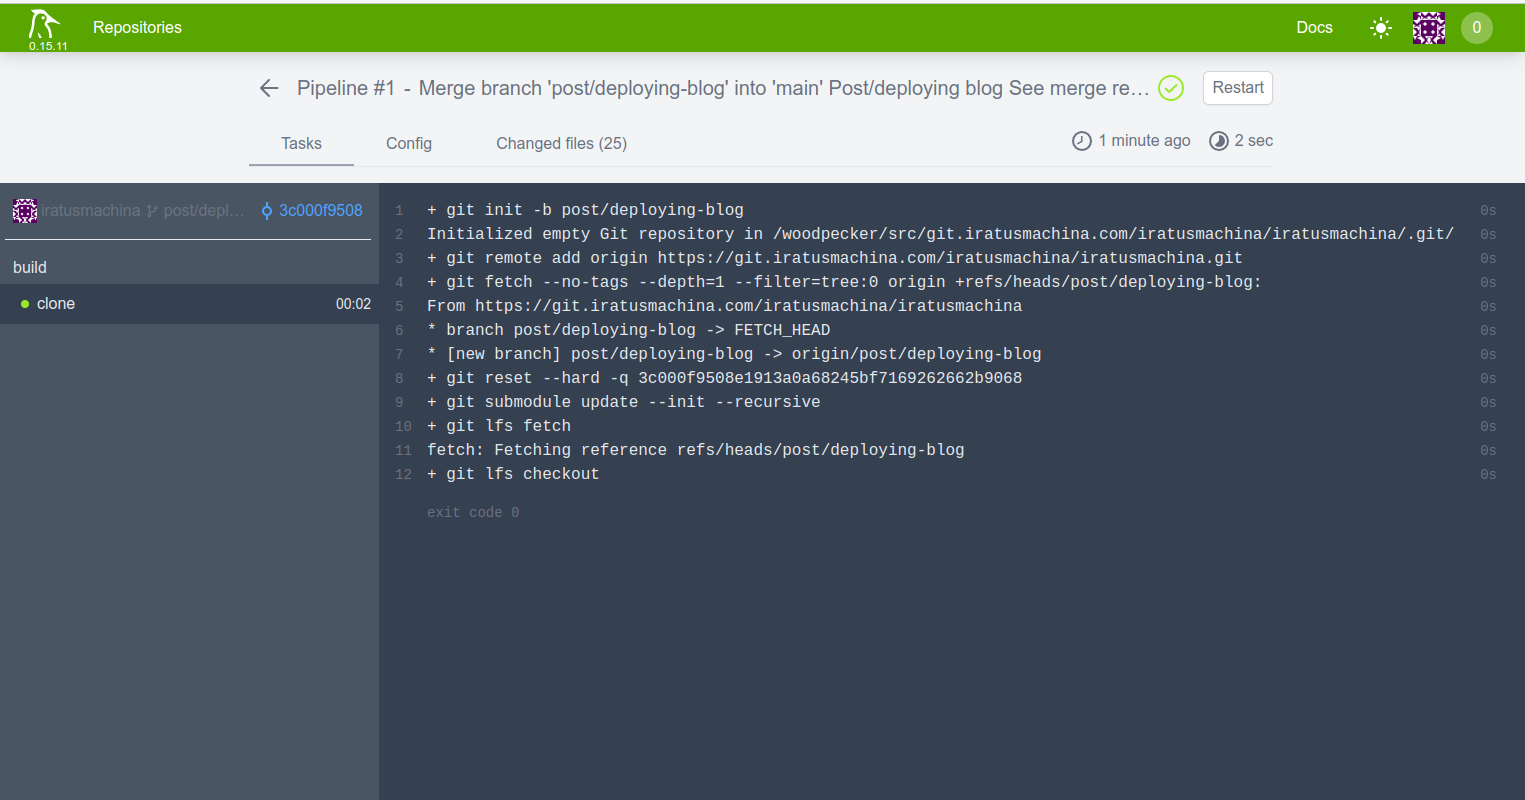
  • The first thing Woodpecker runs before any stage in a pipeline is the clone step. This clone step pulls down the code from the forge (in this case, the Gitea Instance). That is, it pulls down the branch from the forge, that trigged the webhook that is registered at the Gitea Instance from Woodpecker the clone step on evey push to remote. This branch is pulled into the volume/workspace for the commands to work on. This is shown below: Clone step
  • By attaching this when condition,

    when:
      event: [ push ]
      branch: main
    

    to a stage, the commands in the stage get executed on a push to the branch called main. I also had the event pull_request as part of the event list, but I found out that means that the stage run on a creation of a PR into main which is not what I want. If I had some tests, the pull_request would come in handy.

  • I tried to split the commands into different stages but it does not work as shown here

    Changes to files are persisted through steps as the same volume is mounted to all steps

    I think it means that if you installed something in a previous stage in a pipeline, the command you installed would not be available in the next stage in that pipeline. The Changes to files refer to the files created/modified/deleted directly by commands in the stage.

  • Global when do not seem to work for woodpecker v0.15. A global when is something like this (taken from the previous example):

    when:
      event: [ <events from push, pull_request, tag, deployment, cron, manual> ]
      branch: <your branch>
    pipeline:
      <step-name-1>:
        image: <image-name of container where the commands witll be run>
        commands:
            - <First-command>
            - <Second-command>
        secrets: [ <secret-1>, ... ]        
      <step-name-2>:
        ...
    

    So a global when applies to all the stages in the pipeline. In my case, it appears the when condition only applied only if associated with a stage.

  • Initially i tried to use run the pipeline defined above with a key pair (passphrase-based). But i ran into connection issues. Using a passphrase-less key pair solved my connection issues.

  • I tried to pass my login user's password over ssh to run commands as part of the sudo group. But I keep getting errors like these:

    [sudo] password for ********: Sorry, try again.
    [sudo] password for ********:
    sudo: no password was provided
    sudo: 1 incorrect password attempt
    

    So instead, I made it so that my login user would not require sudo to run the command that I wanted to run. I did this by editing the sudoers file instead.

    $ su -
    $ cp /etc/sudoers /root/sudoers.bak
    $ visudo
    $ user ALL=(ALL) NOPASSWD:<command-1>,<command-2> # Add the line at the end of file
    $ exit

ENHANCEMENTS

  • Generate the ssh keys for deploying in CI and use them to deploy the blog. That way, it is more secure than the correct method. i would have to delete the generated key from the public server to avoid the known_hosts file from getting too big.

  • Eliminate calling the ubuntu servers/python servers by providing a user-defined image where I would have installed all the software I need (openssh, Pelican, rsync). This would reduce points of failure as well as enabling me to split the stages in the pipeline for better readbility

  • Upgrade to Woodpecker 1.0x from 0.15x
Jul 01, 2023

CICD Setup

OUTLINE

INTRODUCTION

CI/CD is a fixture of my job as a software engineer and I wanted to learn more about it. So I looked into self-hosting a git forge and a build server. My criteria , in order, was this:

  • easy to adminster
  • able to be left alone, that is, it does not need constant maintenance
  • easy integration between the forge and build server
  • simple UI

Looking the Awesome Self-hosted page on Github, Wikipedia, and on r/selfhosted, I settled on Gitea for the git forge because:

  • it is similar to Github in feel
  • it has Gitea actions which is based on Github actions. This makes easy for me to learn Github actions later on.
  • It has integrations to Gitlab which is another git forge that I use.

As for the build server, I was torn between Jenkins (which I used at a previous job) and Woodpecker CI. I went with Woodpecker CI because:

  • It is "docker-based", which was very useful when I was trying it out. This means that each instance of a build is a workspace based on docker. This is similar to what most build systems (AWS, Azure, Github) do.
  • It is very simple
  • It has a native integration with Gitea.
  • It is written in go which is the same as Gitea

Now, I noticed that. most examples that combine, both Gitea and Woodpecker CI, online use a docker-compose approach. I was weary of that path especially when interfacing with Nginx. Since they were both written in go and are single binaries (well, in the case of Woodpecker CI, three binaries), I figured that they should be able to run them using systemd instead of docker. This will help learn linux further and will also interface properly with the Nginx that is installed on the boxes where they would both live.

INSTALL INSTRUCTIONS

I am using Debian, instead of Ubuntu as the OS for the boxes where the Gitea and Woodpecker CI would live. This is to avoid dealing with snaps. So the instructions to set this is as follows:

(1). Create a domain for each. Mine is woodpecker.iratusmachina.com for the Woodpecker CI and ci.iratusmachina.com for the Gitea instance. I use DigitalOCean to host all my projects so domain creation was easy. I just needed to add A records for both.

(2). Ssh into the Woodpecker box. Install docker by following the instructions in these links: here and here

(3). Ssh into the Gitea Box. Download gitea from here

$ wget https://dl.gitea.com/gitea/1.19.4/gitea-1.19.4-linux-amd64
$ sudo mv gitea-1.19.4-linux-amd64 /usr/local/bin/gitea
$ sudo chmod +x /usr/local/bin/gitea

(4). Ssh into the Woodpecker box. Download the woodpecker binaries from here.

$ wget https://github.com/woodpecker-ci/woodpecker/releases/download/v0.15.11/woodpecker-agent_0.15.11_amd64.deb 
$ wget https://github.com/woodpecker-ci/woodpecker/releases/download/v0.15.11/woodpecker-cli_0.15.11_amd64.deb 
$ wget https://github.com/woodpecker-ci/woodpecker/releases/download/v0.15.11/woodpecker-server_0.15.11_amd64.deb
$ sudo dpkg -i ./woodpecker-*

(5). Create users to allow each application to manage their own data.

# In the Gitea box
$ sudo apt install git
$ sudo adduser --system --shell /bin/bash --gecos 'Git Version Control' --group --disabled-password --home /home/git git

# In the Woodpecker Box
$ sudo adduser --system --shell /bin/bash --gecos 'Woodpecker CI' --group --disabled-password --home /home/<woodpecker-username> <woodpecker-username>
$ sudo usermod -aG docker <woodpecker-username>

(6). Ssh into the Gitea Box.Create directories for gitea based on this link

$ sudo mkdir -p /var/lib/<gitea-username>/{custom,data,log}
$ sudo chown -R git:git /var/lib/<gitea-username>/
$ sudo chmod -R 750 /var/lib/<gitea-username>/
$ sudo mkdir /etc/<gitea-username>
$ sudo chown root:git /etc/<gitea-username>
$ sudo chmod 770 /etc/<gitea-username>

(7). Ssh into the Woodpecker box and create directories for the woodpecker user.

$ sudo mkdir -p /var/lib/<woodpecker-username>
$ sudo chown -R <woodpecker-username>:<woodpecker-username> /var/lib/<woodpecker-username>
$ sudo chmod -R 750 /var/lib/<woodpecker-username>/
$ sudo touch /etc/woodpecker.conf
$ sudo chmod 770 /etc/woodpecker.conf  

(8). Set up database with this guide

# In the both boxes
$ sudo apt-get install postgresql postgresql-contrib
$ sudo -u postgres psql

# In the Gitea Box
postgres=# CREATE ROLE <gitea-username> WITH LOGIN PASSWORD '<gitea-password>';
postgres=# CREATE DATABASE <gitea-database-name> WITH OWNER <gitea-username> TEMPLATE template0 ENCODING UTF8 LC_COLLATE 'en_US.UTF-8' LC_CTYPE 'en_US.UTF-8';

# In the Woodpecker Box
postgres=# CREATE ROLE <woodpecker-username> WITH LOGIN PASSWORD '<woodpecker-database-name>';
postgres=# CREATE DATABASE <woodpecker-database-name> WITH OWNER <woodpecker-username> TEMPLATE template0 ENCODING UTF8 LC_COLLATE 'en_US.UTF-8' LC_CTYPE 'en_US.UTF-8';

# In both boxes
postgres=# exit;

Add the following lines to the your hba_conf

# In both boxes
$ sudo -u postgres psql
postgres=# SHOW hba_file;
 hba_file
-------------------------------------
 /etc/postgresql/14/main/pg_hba.conf
(1 row)
postgres=# exit;

# In Gitea Box
$ sudo nano -c /etc/postgresql/14/main/pg_hba.conf 
# Database administrative login by Unix domain socket
local   <gitea-database-name>         <gitea-username>                                   scram-sha-256

# In Woodpecker Box
$ sudo nano -c /etc/postgresql/14/main/pg_hba.conf 
# Database administrative login by Unix domain socket
local   <woodpecker-database-name>    <woodpecker-username>                              scram-sha-256

(9). Ssh into the Gitea box. Follow this guide to set up the gitea as a systemd service

$ sudo wget https://raw.githubusercontent.com/go-gitea/gitea/main/contrib/systemd/gitea.service -P /etc/systemd/system/
$ sudo nano -c /etc/systemd/system/gitea.service // Uncomment all the postgresql stuff

(10). Start the gitea service with the command sudo systemctl start gitea, Do not worry if you get a failure message like this

Job for gitea.service failed because a timeout was exceeded.
See "systemctl status gitea.service" and "journalctl -xeu gitea.service" for details.

(11). The Gitea server runs on port 3000. Open http://localhost:3000 to configure database settings and create your first admin user for Gitea.

(12). Create the nginx config for the Gitea service.

$ sudo nano -c /etc/nginx/sites-available/gitea.conf

server {
    listen 80;
    server_name git.YOUR_DOMAIN;

    location / {
        proxy_pass http://localhost:3000;
        proxy_http_version 1.1;
        proxy_set_header Host $host;
        proxy_set_header X-Real-IP $remote_addr;
        proxy_set_header X-Forwarded-For $proxy_add_x_forwarded_for;
        proxy_set_header X-Forwarded-Proto $scheme;
        proxy_set_header Connection "";
        chunked_transfer_encoding off;
        proxy_buffering off;
    }
}

(13). Edit the /etc/gitea/app.ini to resemble the below:

$ sudo nano -c /etc/gitea/app.ini
....
[server]
SSH_DOMAIN       = git.YOUR_DOMAIN
DOMAIN           = git.YOUR_DOMAIN
HTTP_PORT        = 3000
ROOT_URL         = http://git.YOUR_DOMAIN/
---

(14). Enable the domain and restart the box.

$ sudo ln -s /etc/nginx/sites-available/gitea.conf /etc/nginx/sites-enabled/
$ sudo reboot

(15). Relogin and restart the gitea service.

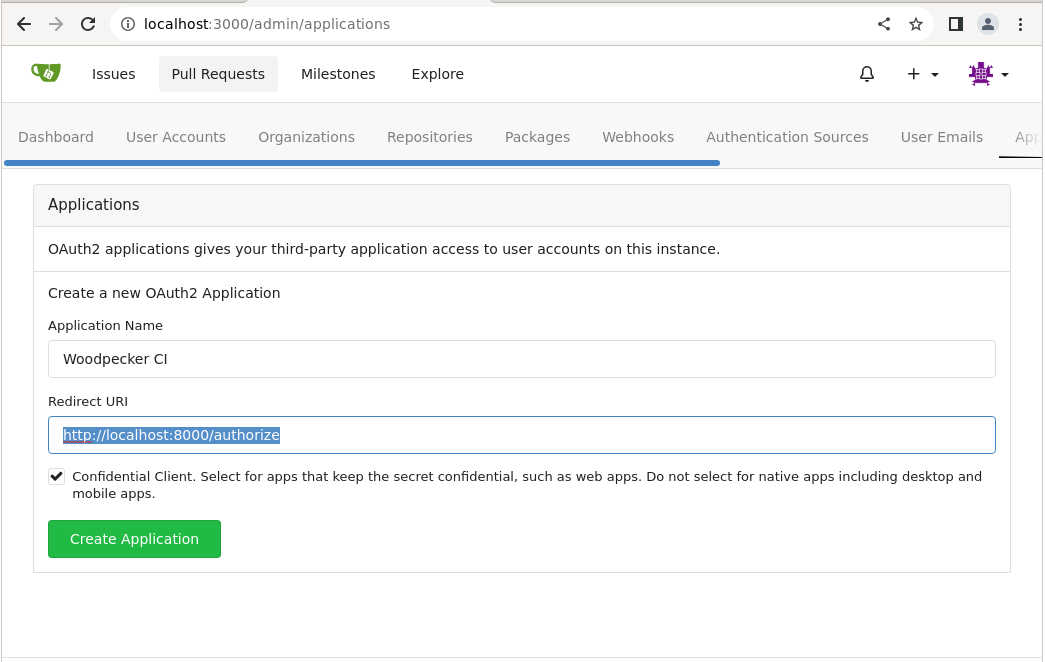
(16). Navigate to http://git.YOUR_DOMAIN/admin/applications to configure to the Oauth application as shown below:
oauth_gitea
Replace the hightlighted line in the picture above with http://build.YOUR_DOMAIN/authorize.Save the Client Id and Client Secret.

(17). Ssh into the Woodpecker box. Create the nginx config for the Woodpecker CI service.

$ sudo nano -c /etc/nginx/sites-available/woodpecker.conf

server {
    listen 80;
    server_name build.YOUR_DOMAIN;

    location / {
        proxy_set_header X-Forwarded-For $remote_addr;
        proxy_set_header X-Forwarded-Proto $scheme;
        proxy_set_header Host $http_host;

        proxy_pass http://127.0.0.1:8000;
        proxy_redirect off;
        proxy_http_version 1.1;
        proxy_set_header Connection "";
        proxy_buffering off;

        chunked_transfer_encoding off;
    }
}

(18). Enable the domain and restart the box.

$ sudo ln -s /etc/nginx/sites-available/woodpecker.conf /etc/nginx/sites-enabled/
$ sudo reboot

(19). Ssh into Woodpecker Box. Open a file /etc/systemd/system/woodpecker.service and paste the following:

$ sudo nano -c /etc/systemd/system/woodpecker.service
[Unit]
Description=Woodpecker
Documentation=https://woodpecker-ci.org/docs/intro
Requires=network-online.target
After=network-online.target

[Service]
User=woodpecker
Group=woodpecker
EnvironmentFile=/etc/woodpecker.conf
ExecStart=/usr/local/bin/woodpecker-server
RestartSec=5
Restart=on-failure
SyslogIdentifier=woodpecker-server
WorkingDirectory=/var/lib/woodpecker

[Install]
WantedBy=multi-user.target

(20). Open another file and pass the following:

WOODPECKER_OPEN=true
WOODPECKER_HOST=http://build.YOUR_DOMAIN
WOODPECKER_GITEA=true
WOODPECKER_GITEA_URL=http://git.YOUR_DOMAIN
WOODPECKER_GITEA_CLIENT=<Client ID from 16>
WOODPECKER_GITEA_SECRET=<Client Secret from 16>
WOODPECKER_GITEA_SKIP_VERIFY=true
WOODPECKER_DATABASE_DRIVER=postgres
WOODPECKER_LOG_LEVEL=info
WOODPECKER_DATABASE_DATASOURCE=postgres://<woodpecker-username>:<woodpecker-db-password>@127.0.0.1:5432/<woodpecker-db-username>?sslmode=disable
GODEBUG=netdns=go

(21). Start the woodpecker service and navigate to http://build.YOUR_DOMAIN. Click the login button. It will take to a page where you can authorize woodpecker to receive webhooks.

(22). Stop the woodpecker service

$ sudo systemctl stop woodpecker

(23). Generate a long random string to be used a secret for the woodpecker-agent to communicate with the woodpecker-server with this command

$ openssl rand -hex 32`

(24). Add that secret from step (23) to the /etc/woodpecker.conf as follows:

...
WOODPECKER_AGENT_SECRET=GENERATED_SECRET

(25). Open file /etc/systemd/system/woodpecker-agent.service and add this

$ sudo nano -c /etc/systemd/system/woodpecker-agent.service
[Unit]
Description=Woodpecker
Documentation=https://woodpecker-ci.org/docs/intro
Requires=network-online.target
After=network-online.target

[Service]
User=woodpecker
Group=woodpecker
EnvironmentFile=/etc/woodpecker-agent.conf
ExecStart=/usr/local/bin/woodpecker-agent
RestartSec=5
Restart=on-failure
SyslogIdentifier=woodpecker-agent
WorkingDirectory=/var/lib/woodpecker

[Install]
WantedBy=multi-user.target

(26). Open file /etc/woodpecker-agent.conf and add the same secret from step (23).

WOODPECKER_SERVER=localhost:9000
WOODPECKER_BACKEND=docker
WOODPECKER_AGENT_SECRET=GENERATED_SECRET

(27). Restart woodpecker-server

$ sudo systemctl start woodpecker`

(28). Start woodpecker-agent with

$ sudo systemctl start woodpecker-agent 

(29). Reboot the two boxes.

(30). To add https, install certbot and select all default choices

# In both boxes
$ sudo apt-get install certbot python3-certbot-nginx
$ sudo certbot --nginx
$ sudo systemctl restart nginx

(31). Modify the /etc/gitea/app.ini to add https

$ sudo nano -c /etc/gitea/app.ini
....
[server]
SSH_DOMAIN       = git.YOUR_DOMAIN
DOMAIN           = git.YOUR_DOMAIN
HTTP_PORT        = 3000
ROOT_URL         = https://git.YOUR_DOMAIN/

(32). Modify the /etc/woodpecker.conf to add the https urls

WOODPECKER_HOST=https://build.YOUR_DOMAIN
...
WOODPECKER_GITEA_URL=https://git.YOUR_DOMAIN
...

(33). Enable all the services to start on boot

# In the Gitea box
$ sudo systemctl enable gitea

# In the Woodpecker box
$ sudo systemctl enable woodpecker
$ sudo systemctl enable woodpecker-agent

TESTING INSTRUCTIONS

For testing this setup, follow these instructions:

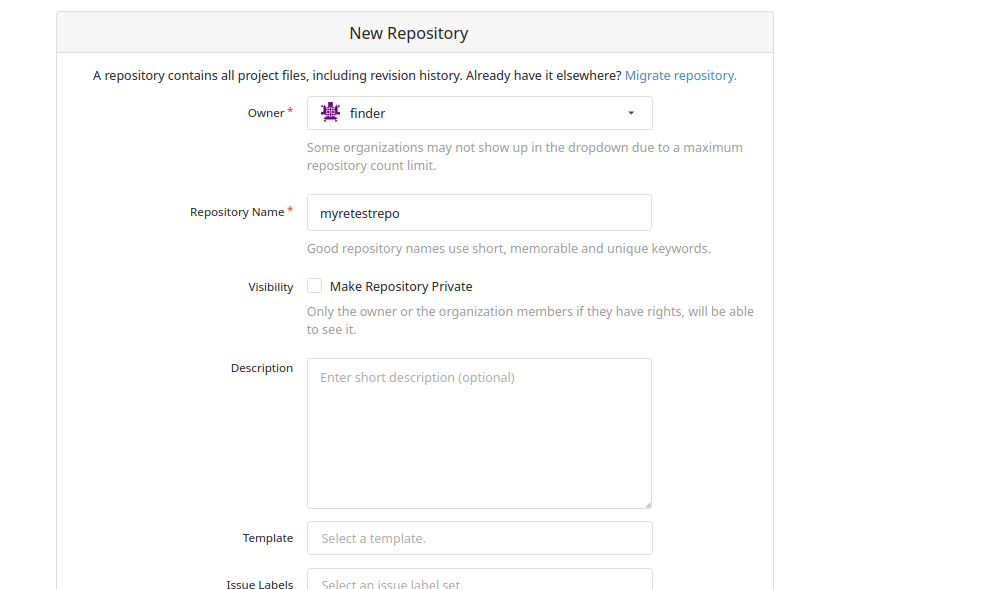
(a) Go to the Gitea UI. Select "+". There should be a dropdown with some options. Select "New Repository" select_new_repository

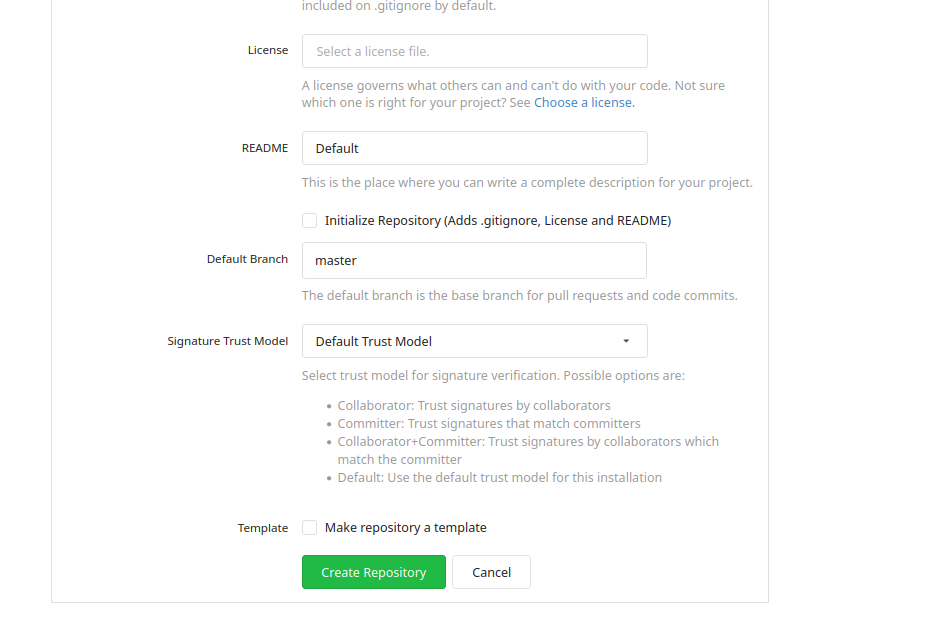
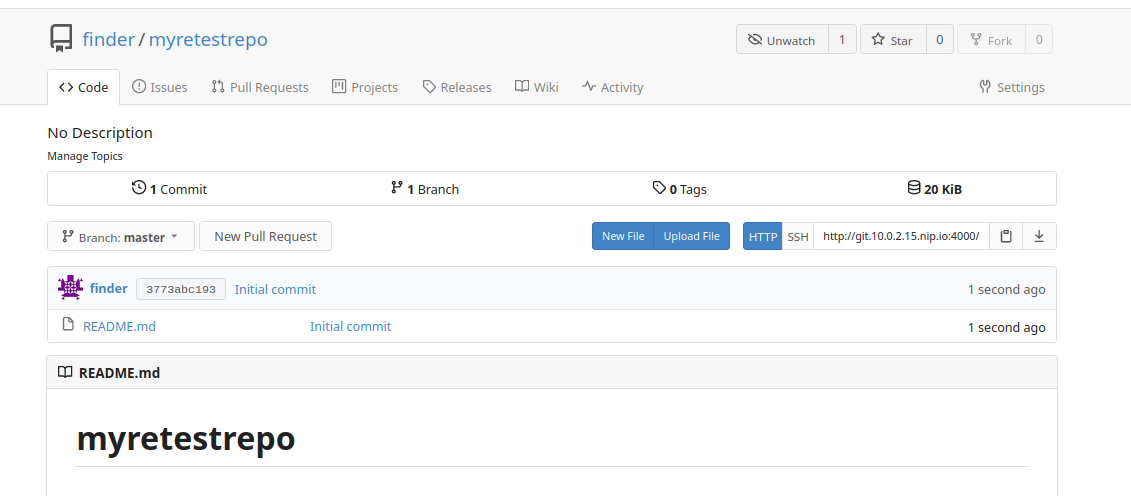
(b) Fill out the form and select the checkbox "Initialize Repository". Click the button "Create Repository". new_repo_creation init_repository newly_created_repo

(c) Go back to the Woodpecker CI UI. And click "Add repository". add_repository

(d) Then click "Reload Repositories" and your repository should appear. reload_repositories

(e) Then click "Enable". enable_repositories enable_repositories_v2

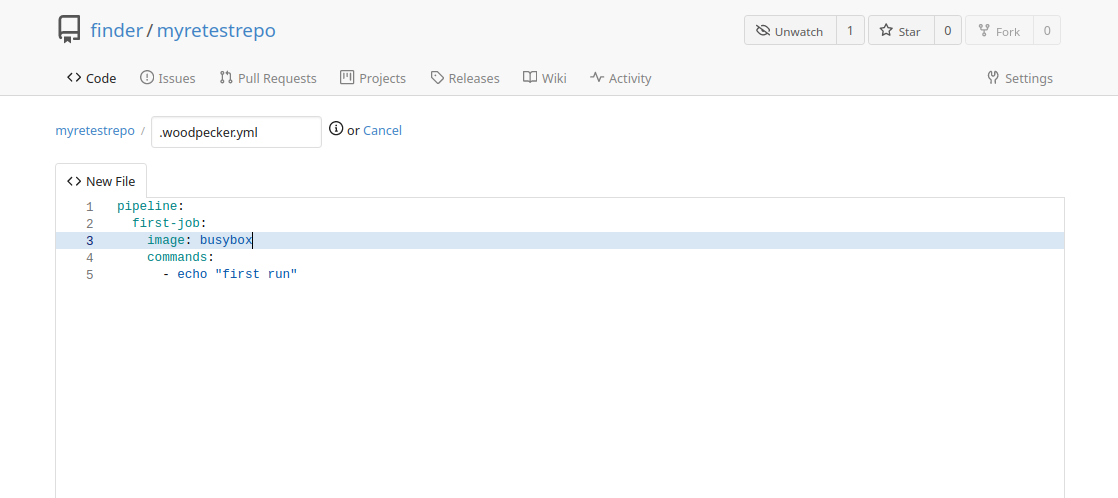
(f) Head back to the Gitea UI in (b) and click "New File". Add a sample pipeline.yml from this link

pipeline:
  run-one:
    image: busybox
    group: first
    commands:
      - echo "first run"

  run-two:
    image: busybox
    group: first
    commands:
      - echo "second run"

  run-three:
    image: ubuntu
    commands:
      - echo hi
when:
  branch:
    include: [ master, release/* ]
    exclude: [ test/1.0.0, test/1.1.* ]

new_file

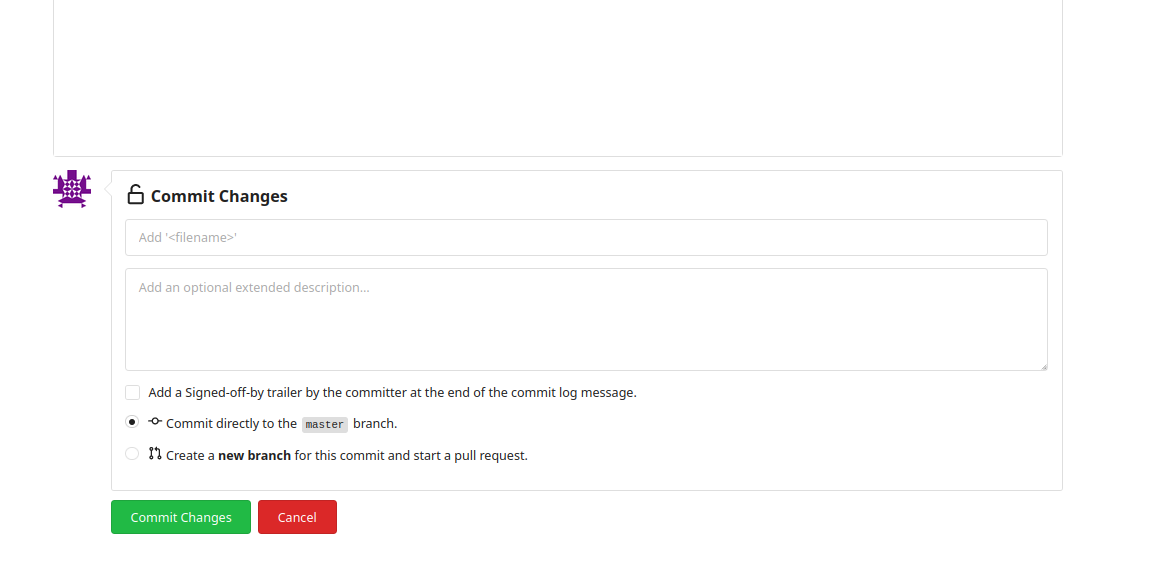
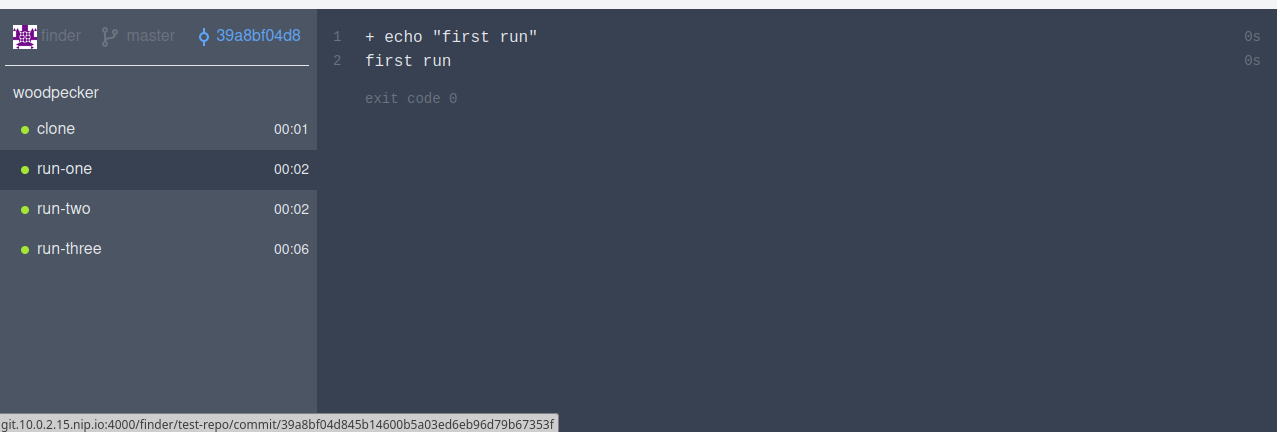
(g) Commit the file to the master branch. Head to the Woodpecker CI UI and you should see that your build should have completed. commit_changes successful_run

OBSERVATIONS

(a) I had initially wanted to run both of them, the Gitea instance and Woodpecker CI on the same host. I tried running both to them locally testing with localhost but I never went past step 21 of the installation guide. I kept getting errors like below and is referenced below this

{"level":"error","time":"2022-12-xxxx","message":"cannot authenticate user. Post \"http://localhost.lan/login/oauth/access_token\": dial tcp 127.0.0.1:80: connect: connection refused"}

This error magically did not show up when running in docker. Since I was not running in docker for my production setup, I had to run both on their own host

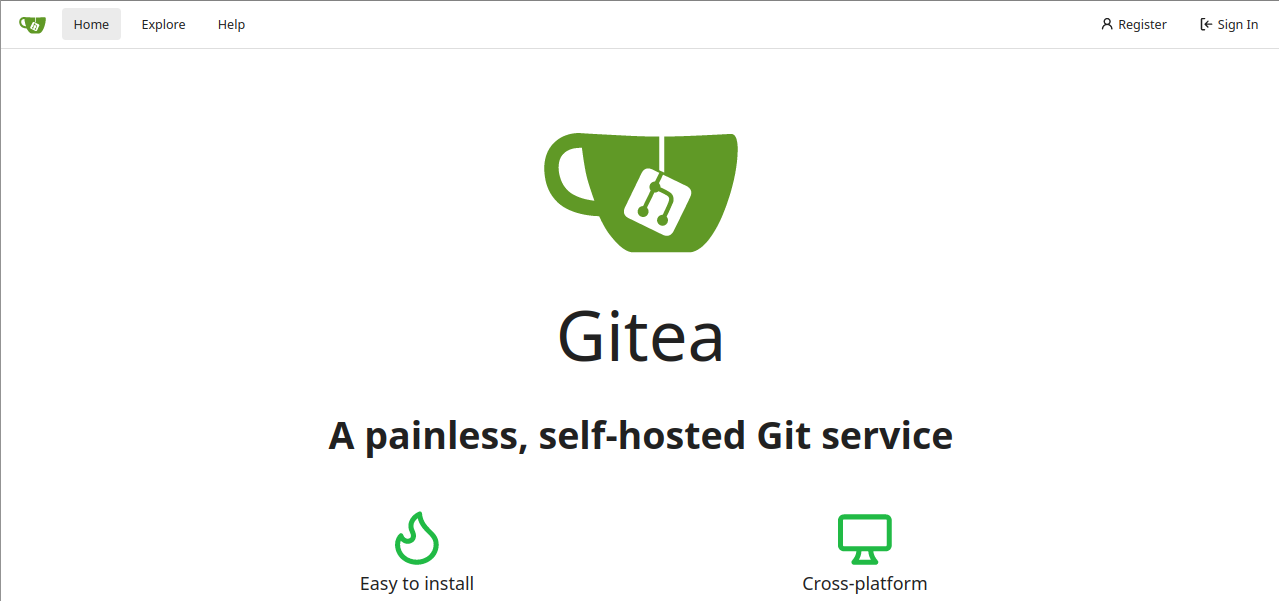
(b) So when you go to the Gitea UI fron the installation steps above, you would see this:

gitea_instance_homepage

So based on this, anyone can register for an account at your service. The side effect is that any new account has automatic admin priviledges upon creation, which is described here. If you want to disable signups, you would set this attribute in the etc/gitea/app.ini according to this link

...
[service]
...
DISABLE_REGISTRATION = true
...

Sep 22, 2021

Running a jenkins server in DigitalOcean

At work, I started playing with Azure. It is so different to AWS. More on that in subsequent posts.

We are supposed to set up a CI/CD pipeline with Jenkins as the build tool instead of Azure. The reason for that is to deploy Azure functions, the equivalent to AWS Lambda.

So I am not familiar with Jenkins. I then decided to set up Jenkins on DigitalOcean. The reason being is that DigitalOcean is my preferred Cloud prvoider for any hands-on devops work.

The steps assume that you have already followed these instructions and these instructions. The steps that I took are as follows:

  1. Upgrade everything. For me, that means running a script. The script, aptly named upgrade.sh is shown below.

    #!/bin/bash

    echo "Upgrading"

    sudo DEBIAN_FRONTEND=noninteractive apt-get -yq update

    sudo DEBIAN_FRONTEND=noninteractive apt-get -yq dist-upgrade

    echo "Cleaning up"

    sudo apt-get -yf install && sudo apt-get -y autoremove && sudo apt-get -y autoclean && sudo apt-get -y clean

  2. Install jenkins key

    wget -q -O - https://pkg.jenkins.io/debian-stable/jenkins.io.key | sudo apt-key add -

  3. Install the apt repository

    sudo sh -c 'echo deb http://pkg.jenkins.io/debian-stable binary/ > /etc/apt/sources.list.d/jenkins.list'

  4. Run (1)

  5. Install jre and jdk. They have to be installed before installing jenkins because jenkins depends on them to run.

    sudo apt install default-jre

    sudo apt install default-jdk

  6. Install jenkins.

    sudo apt install jenkins

  7. Start the jenkins server and allow jenkins into the firewall(ufw). The default port for jenkins is port 8080.

    sudo systemctl start jenkins

    sudo systemctl status jenkins

    sudo ufw allow 8080

    sudo ufw status

  8. Go the browser http://localhost.com:8080. Follow in the instructions in the Setup wizard and Plugins and Admin user. The url for the instance can be found here

    grep jenkinsUrl /var/lib/jenkins/*.xml

So Jenkins is setup. But it is on a http endpoint, instead of https. I wanted to set up the jenkins instance on the same droplet that hosts this website and set it up with a https endpoint. To do this, I followed this steps below:

  1. Set up a different sub-domain by following these instructions. Apparently I thought I needed to add a CNAME record. That is not needed.
  2. Create a new domain file.

    sudo cp /etc/nginx/sites-available/default /etc/nginx/sites-available/example.com

  3. Modify the domain file to look like this

    server {

    access_log /var/log/nginx/jenkins.access.log;

    error_log /var/log/nginx/jenkins.error.log;

    location / {

    include /etc/nginx/proxy_params;

    proxy_pass http://locahost:8080;

    proxy_read_timeout 90s;

    proxy_redirect http://localhost:8080 https://example.com;

    }

    }

  4. Run the config test.

    sudo nginx -t

  5. Link the domain file in sites-available to sites-enabled. It needs to be done to allow nginx to load your config

    sudo ln -s /etc/nginx/sites-available/example.com /etc/nginx/sites-enabled

  6. Modify the JENKINS_ARGS in /etc/default/jenkins file to look like below:

    JENKINS_ARGS="--webroot=/var/cache/$NAME/war --httpPort=$HTTP_PORT --httpListenAddress=127.0.0.1"

  7. Modify the url for the jenkins instance by modifying the jenkinsUrl in the file /var/lib/jenkins/jenkins.model.JenkinsLocationConfiguration.xml to look like this:

    <jenkinsUrl>http://127.0.0.1:8080/</jenkinsUrl>

  8. Run the certbot program and enter 1 when prompted.

    sudo certbox --nginx -d example.com

Aug 09, 2020

First post

This is the my first post with a familar blogging engine, Pelican. Choosing Pelican over Hugo was due to the fact I am more comfortable with Python. Maybe in the future, I might go over the dark side of Go with Hugo. Anyways, expect more from me in the coming days.

BTW, Ad meliora means Towards Better Things.