CICD Setup
OUTLINE
INTRODUCTION
CI/CD is a fixture of my job as a software engineer and I wanted to learn more about it. So I looked into self-hosting a git forge and a build server. My criteria , in order, was this:
- easy to adminster
- able to be left alone, that is, it does not need constant maintenance
- easy integration between the forge and build server
- simple UI
Looking the Awesome Self-hosted page on Github, Wikipedia, and on r/selfhosted, I settled on Gitea for the git forge because:
- it is similar to Github in feel
- it has Gitea actions which is based on Github actions. This makes easy for me to learn Github actions later on.
- It has integrations to Gitlab which is another git forge that I use.
As for the build server, I was torn between Jenkins (which I used at a previous job) and Woodpecker CI. I went with Woodpecker CI because:
- It is "docker-based", which was very useful when I was trying it out. This means that each instance of a build is a workspace based on docker. This is similar to what most build systems (AWS, Azure, Github) do.
- It is very simple
- It has a native integration with Gitea.
- It is written in go which is the same as Gitea
Now, I noticed that. most examples that combine, both Gitea and Woodpecker CI, online use a docker-compose approach. I was weary of that path especially when interfacing with Nginx. Since they were both written in go and are single binaries (well, in the case of Woodpecker CI, three binaries), I figured that they should be able to run them using systemd instead of docker. This will help learn linux further and will also interface properly with the Nginx that is installed on the boxes where they would both live.
INSTALL INSTRUCTIONS
I am using Debian, instead of Ubuntu as the OS for the boxes where the Gitea and Woodpecker CI would live. This is to avoid dealing with snaps. So the instructions to set this is as follows:
(1). Create a domain for each. Mine is woodpecker.iratusmachina.com for the Woodpecker CI and ci.iratusmachina.com for the Gitea instance. I use DigitalOCean to host all my projects so domain creation was easy. I just needed to add A records for both.
(2). Ssh into the Woodpecker box. Install docker by following the instructions in these links: here and here
(3). Ssh into the Gitea Box. Download gitea from here
$ wget https://dl.gitea.com/gitea/1.19.4/gitea-1.19.4-linux-amd64
$ sudo mv gitea-1.19.4-linux-amd64 /usr/local/bin/gitea
$ sudo chmod +x /usr/local/bin/gitea
(4). Ssh into the Woodpecker box. Download the woodpecker binaries from here.
$ wget https://github.com/woodpecker-ci/woodpecker/releases/download/v0.15.11/woodpecker-agent_0.15.11_amd64.deb
$ wget https://github.com/woodpecker-ci/woodpecker/releases/download/v0.15.11/woodpecker-cli_0.15.11_amd64.deb
$ wget https://github.com/woodpecker-ci/woodpecker/releases/download/v0.15.11/woodpecker-server_0.15.11_amd64.deb
$ sudo dpkg -i ./woodpecker-*
(5). Create users to allow each application to manage their own data.
# In the Gitea box
$ sudo apt install git
$ sudo adduser --system --shell /bin/bash --gecos 'Git Version Control' --group --disabled-password --home /home/git git

# In the Woodpecker Box
$ sudo adduser --system --shell /bin/bash --gecos 'Woodpecker CI' --group --disabled-password --home /home/<woodpecker-username> <woodpecker-username>
$ sudo usermod -aG docker <woodpecker-username>
(6). Ssh into the Gitea Box.Create directories for gitea based on this link
$ sudo mkdir -p /var/lib/<gitea-username>/{custom,data,log}
$ sudo chown -R git:git /var/lib/<gitea-username>/
$ sudo chmod -R 750 /var/lib/<gitea-username>/
$ sudo mkdir /etc/<gitea-username>
$ sudo chown root:git /etc/<gitea-username>
$ sudo chmod 770 /etc/<gitea-username>
(7). Ssh into the Woodpecker box and create directories for the woodpecker user.
$ sudo mkdir -p /var/lib/<woodpecker-username>
$ sudo chown -R <woodpecker-username>:<woodpecker-username> /var/lib/<woodpecker-username>
$ sudo chmod -R 750 /var/lib/<woodpecker-username>/
$ sudo touch /etc/woodpecker.conf
$ sudo chmod 770 /etc/woodpecker.conf
(8). Set up database with this guide
# In the both boxes
$ sudo apt-get install postgresql postgresql-contrib
$ sudo -u postgres psql

# In the Gitea Box
postgres=# CREATE ROLE <gitea-username> WITH LOGIN PASSWORD '<gitea-password>';
postgres=# CREATE DATABASE <gitea-database-name> WITH OWNER <gitea-username> TEMPLATE template0 ENCODING UTF8 LC_COLLATE 'en_US.UTF-8' LC_CTYPE 'en_US.UTF-8';

# In the Woodpecker Box
postgres=# CREATE ROLE <woodpecker-username> WITH LOGIN PASSWORD '<woodpecker-database-name>';
postgres=# CREATE DATABASE <woodpecker-database-name> WITH OWNER <woodpecker-username> TEMPLATE template0 ENCODING UTF8 LC_COLLATE 'en_US.UTF-8' LC_CTYPE 'en_US.UTF-8';

# In both boxes
postgres=# exit;
Add the following lines to the your hba_conf
# In both boxes
$ sudo -u postgres psql
postgres=# SHOW hba_file;
 hba_file
-------------------------------------
 /etc/postgresql/14/main/pg_hba.conf
(1 row)
postgres=# exit;

# In Gitea Box
$ sudo nano -c /etc/postgresql/14/main/pg_hba.conf
# Database administrative login by Unix domain socket
local   <gitea-database-name>         <gitea-username>                                   scram-sha-256

# In Woodpecker Box
$ sudo nano -c /etc/postgresql/14/main/pg_hba.conf
# Database administrative login by Unix domain socket
local   <woodpecker-database-name>    <woodpecker-username>                              scram-sha-256
(9). Ssh into the Gitea box. Follow this guide to set up the gitea as a systemd service
$ sudo wget https://raw.githubusercontent.com/go-gitea/gitea/main/contrib/systemd/gitea.service -P /etc/systemd/system/
$ sudo nano -c /etc/systemd/system/gitea.service // Uncomment all the postgresql stuff
(10). Start the gitea service with the command sudo systemctl start gitea, Do not worry if you get a failure message like this
Job for gitea.service failed because a timeout was exceeded.
See "systemctl status gitea.service" and "journalctl -xeu gitea.service" for details.
(11). The Gitea server runs on port 3000. Open http://localhost:3000 to configure database settings and create your first admin user for Gitea.
(12). Create the nginx config for the Gitea service.
$ sudo nano -c /etc/nginx/sites-available/gitea.conf

server {
    listen 80;
    server_name git.YOUR_DOMAIN;

    location / {
        proxy_pass http://localhost:3000;
        proxy_http_version 1.1;
        proxy_set_header Host $host;
        proxy_set_header X-Real-IP $remote_addr;
        proxy_set_header X-Forwarded-For $proxy_add_x_forwarded_for;
        proxy_set_header X-Forwarded-Proto $scheme;
        proxy_set_header Connection "";
        chunked_transfer_encoding off;
        proxy_buffering off;
    }
}
(13). Edit the /etc/gitea/app.ini to resemble the below:
$ sudo nano -c /etc/gitea/app.ini
....
[server]
SSH_DOMAIN       = git.YOUR_DOMAIN
DOMAIN           = git.YOUR_DOMAIN
HTTP_PORT        = 3000
ROOT_URL         = http://git.YOUR_DOMAIN/
---
(14). Enable the domain and restart the box.
$ sudo ln -s /etc/nginx/sites-available/gitea.conf /etc/nginx/sites-enabled/
$ sudo reboot
(15). Relogin and restart the gitea service.
(16). Navigate to http://git.YOUR_DOMAIN/admin/applications to configure to the Oauth application as shown below:
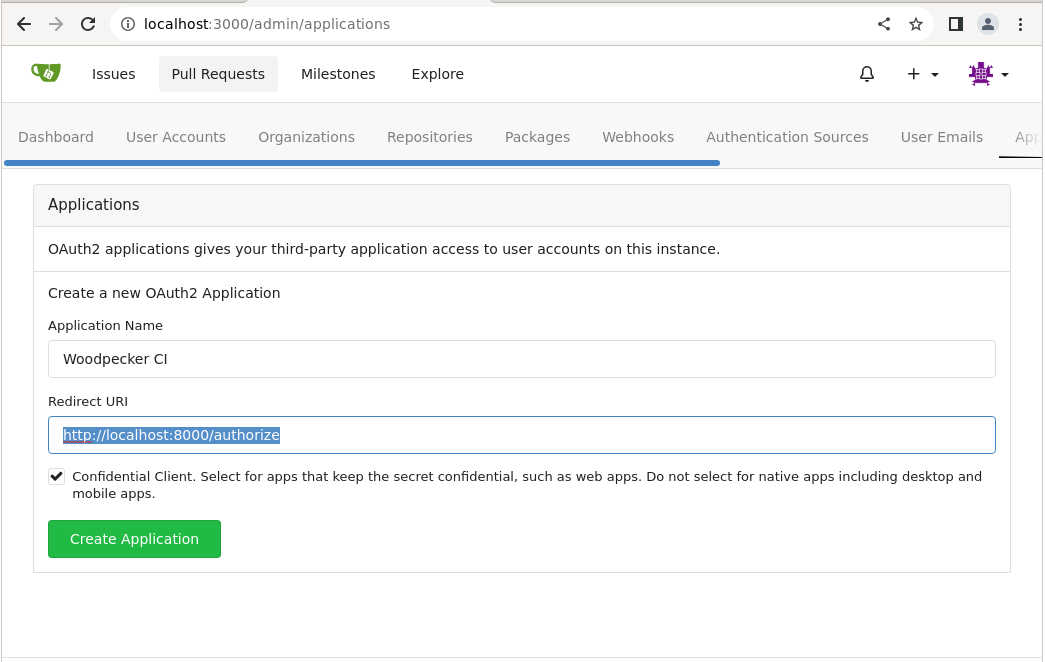
Replace the hightlighted line in the picture above with http://build.YOUR_DOMAIN/authorize.Save the Client Id and Client Secret.
(17). Ssh into the Woodpecker box. Create the nginx config for the Woodpecker CI service.
$ sudo nano -c /etc/nginx/sites-available/woodpecker.conf

server {
    listen 80;
    server_name build.YOUR_DOMAIN;

    location / {
        proxy_set_header X-Forwarded-For $remote_addr;
        proxy_set_header X-Forwarded-Proto $scheme;
        proxy_set_header Host $http_host;

        proxy_pass http://127.0.0.1:8000;
        proxy_redirect off;
        proxy_http_version 1.1;
        proxy_set_header Connection "";
        proxy_buffering off;

        chunked_transfer_encoding off;
    }
}
(18). Enable the domain and restart the box.
$ sudo ln -s /etc/nginx/sites-available/woodpecker.conf /etc/nginx/sites-enabled/
$ sudo reboot
(19). Ssh into Woodpecker Box. Open a file /etc/systemd/system/woodpecker.service and paste the following:
$ sudo nano -c /etc/systemd/system/woodpecker.service
[Unit]
Description=Woodpecker
Documentation=https://woodpecker-ci.org/docs/intro
Requires=network-online.target
After=network-online.target

[Service]
User=woodpecker
Group=woodpecker
EnvironmentFile=/etc/woodpecker.conf
ExecStart=/usr/local/bin/woodpecker-server
RestartSec=5
Restart=on-failure
SyslogIdentifier=woodpecker-server
WorkingDirectory=/var/lib/woodpecker

[Install]
WantedBy=multi-user.target
(20). Open another file and pass the following:
WOODPECKER_OPEN=true
WOODPECKER_HOST=http://build.YOUR_DOMAIN
WOODPECKER_GITEA=true
WOODPECKER_GITEA_URL=http://git.YOUR_DOMAIN
WOODPECKER_GITEA_CLIENT=<Client ID from 16>
WOODPECKER_GITEA_SECRET=<Client Secret from 16>
WOODPECKER_GITEA_SKIP_VERIFY=true
WOODPECKER_DATABASE_DRIVER=postgres
WOODPECKER_LOG_LEVEL=info
WOODPECKER_DATABASE_DATASOURCE=postgres://<woodpecker-username>:<woodpecker-db-password>@127.0.0.1:5432/<woodpecker-db-username>?sslmode=disable
GODEBUG=netdns=go
(21). Start the woodpecker service and navigate to http://build.YOUR_DOMAIN. Click the login button. It will take to a page where you can authorize woodpecker to receive webhooks.
(22). Stop the woodpecker service
$ sudo systemctl stop woodpecker
(23). Generate a long random string to be used a secret for the woodpecker-agent to communicate with the woodpecker-server with this command
$ openssl rand -hex 32`
(24). Add that secret from step (23) to the /etc/woodpecker.conf as follows:
...
WOODPECKER_AGENT_SECRET=GENERATED_SECRET
(25). Open file /etc/systemd/system/woodpecker-agent.service and add this
$ sudo nano -c /etc/systemd/system/woodpecker-agent.service
[Unit]
Description=Woodpecker
Documentation=https://woodpecker-ci.org/docs/intro
Requires=network-online.target
After=network-online.target

[Service]
User=woodpecker
Group=woodpecker
EnvironmentFile=/etc/woodpecker-agent.conf
ExecStart=/usr/local/bin/woodpecker-agent
RestartSec=5
Restart=on-failure
SyslogIdentifier=woodpecker-agent
WorkingDirectory=/var/lib/woodpecker

[Install]
WantedBy=multi-user.target
(26). Open file /etc/woodpecker-agent.conf and add the same secret from step (23).
WOODPECKER_SERVER=localhost:9000
WOODPECKER_BACKEND=docker
WOODPECKER_AGENT_SECRET=GENERATED_SECRET
(27). Restart woodpecker-server
$ sudo systemctl start woodpecker`
(28). Start woodpecker-agent with
$ sudo systemctl start woodpecker-agent
(29). Reboot the two boxes.
(30). To add https, install certbot and select all default choices
# In both boxes
$ sudo apt-get install certbot python3-certbot-nginx
$ sudo certbot --nginx
$ sudo systemctl restart nginx
(31). Modify the /etc/gitea/app.ini to add https
$ sudo nano -c /etc/gitea/app.ini
....
[server]
SSH_DOMAIN       = git.YOUR_DOMAIN
DOMAIN           = git.YOUR_DOMAIN
HTTP_PORT        = 3000
ROOT_URL         = https://git.YOUR_DOMAIN/
(32). Modify the /etc/woodpecker.conf to add the https urls
WOODPECKER_HOST=https://build.YOUR_DOMAIN
...
WOODPECKER_GITEA_URL=https://git.YOUR_DOMAIN
...
(33). Enable all the services to start on boot
# In the Gitea box
$ sudo systemctl enable gitea

# In the Woodpecker box
$ sudo systemctl enable woodpecker
$ sudo systemctl enable woodpecker-agent
TESTING INSTRUCTIONS
For testing this setup, follow these instructions:
(a) Go to the Gitea UI. Select "+". There should be a dropdown with some options. Select "New Repository"
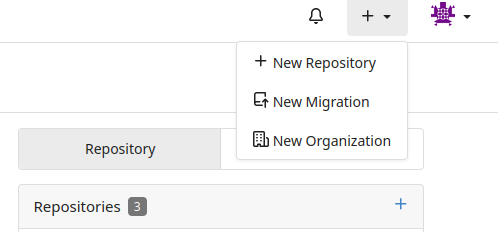
(b) Fill out the form and select the checkbox "Initialize Repository". Click the button "Create Repository".
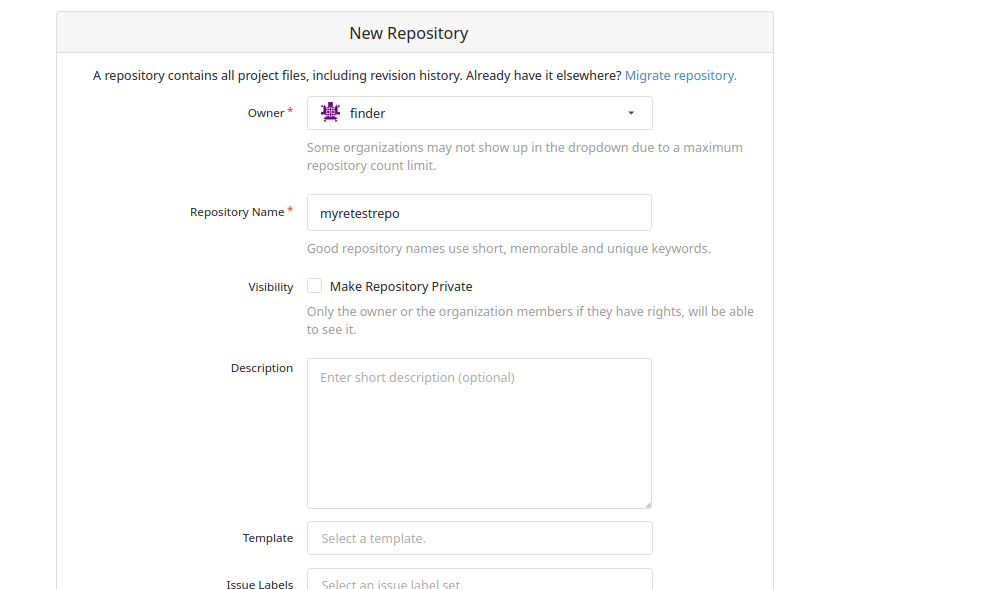
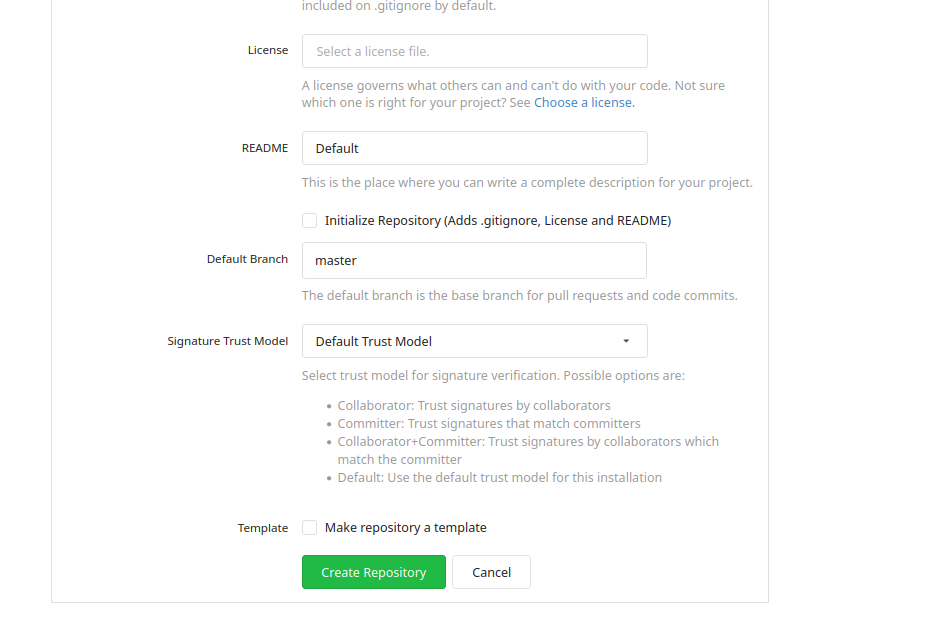
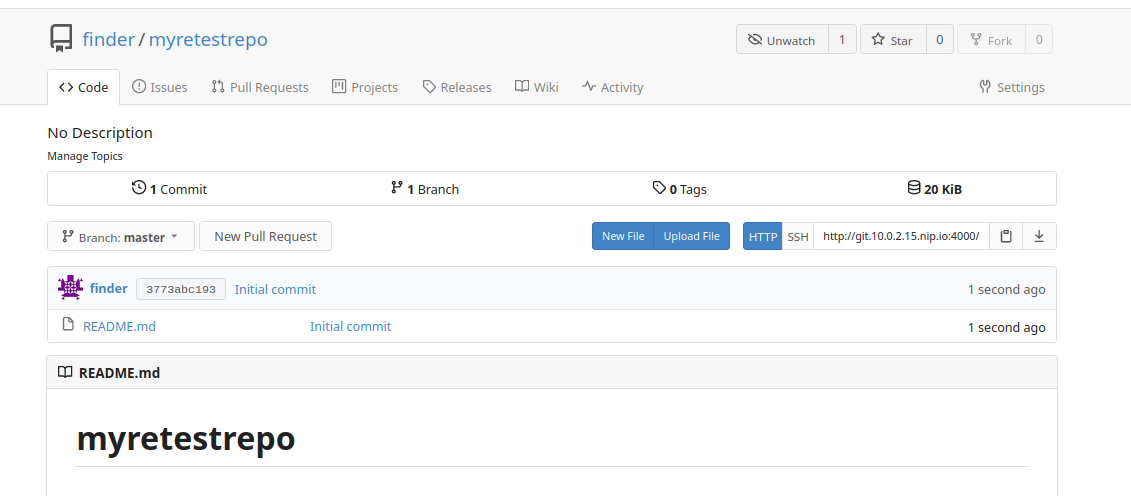
(c) Go back to the Woodpecker CI UI. And click "Add repository".

(d) Then click "Reload Repositories" and your repository should appear.

(e) Then click "Enable".


(f) Head back to the Gitea UI in (b) and click "New File". Add a sample pipeline.yml from this link
pipeline:
  run-one:
    image: busybox
    group: first
    commands:
      - echo "first run"

  run-two:
    image: busybox
    group: first
    commands:
      - echo "second run"

  run-three:
    image: ubuntu
    commands:
      - echo hi
when:
  branch:
    include: [ master, release/* ]
    exclude: [ test/1.0.0, test/1.1.* ]
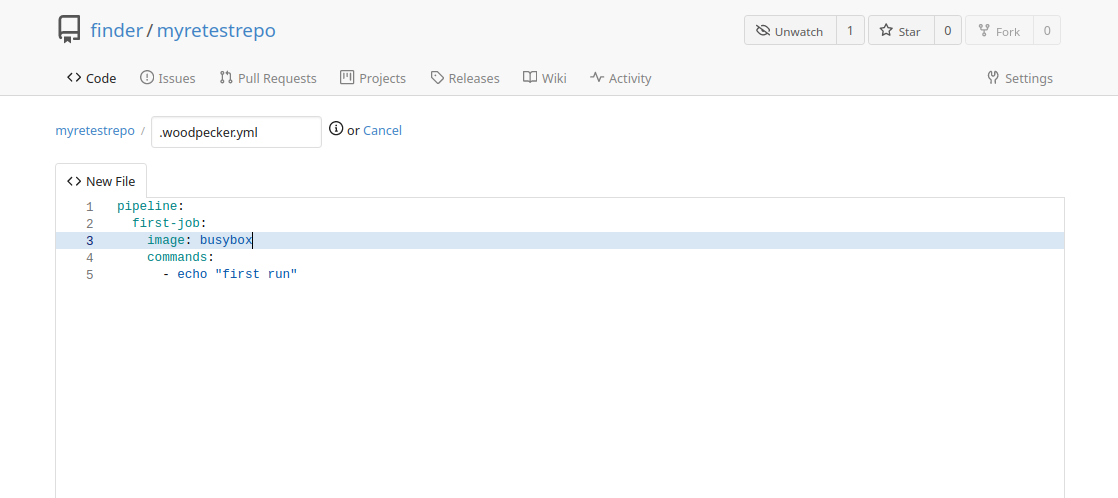
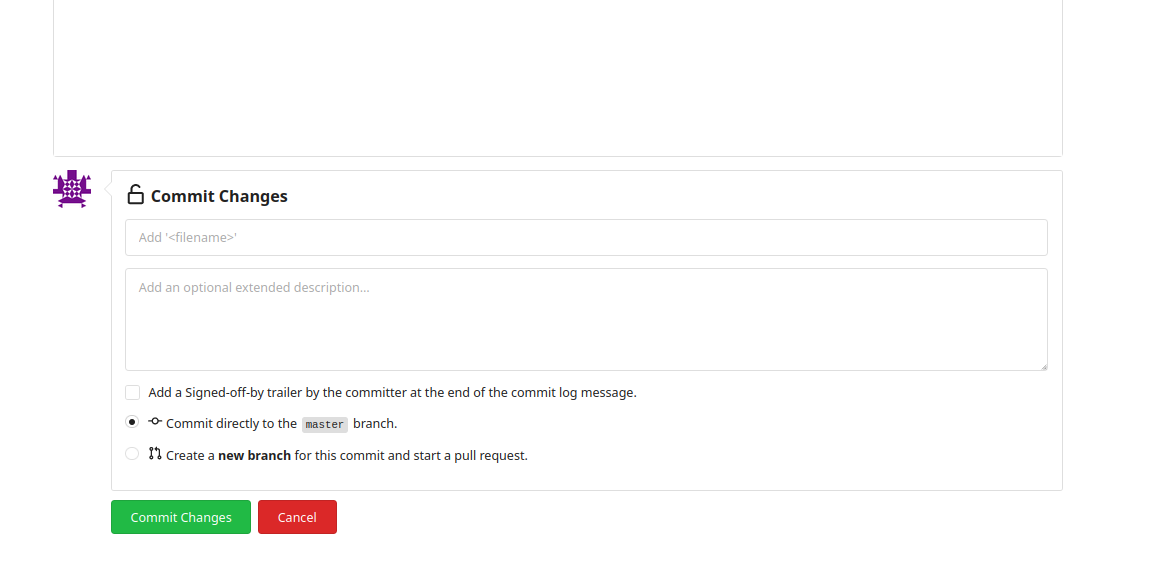
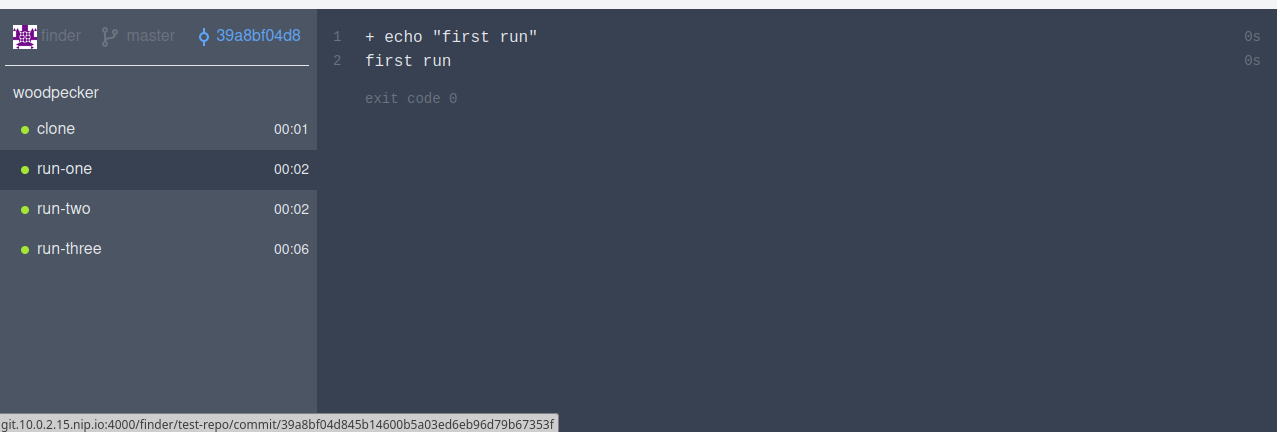
(g) Commit the file to the master branch. Head to the Woodpecker CI UI and you should see that your build should have completed.
OBSERVATIONS
(a) I had initially wanted to run both of them, the Gitea instance and Woodpecker CI on the same host. I tried running both to them locally testing with localhost but I never went past step 21 of the installation guide. I kept getting errors like below and is referenced below this
{"level":"error","time":"2022-12-xxxx","message":"cannot authenticate user. Post \"http://localhost.lan/login/oauth/access_token\": dial tcp 127.0.0.1:80: connect: connection refused"}
This error magically did not show up when running in docker. Since I was not running in docker for my production setup, I had to run both on their own host
(b) So when you go to the Gitea UI fron the installation steps above, you would see this:
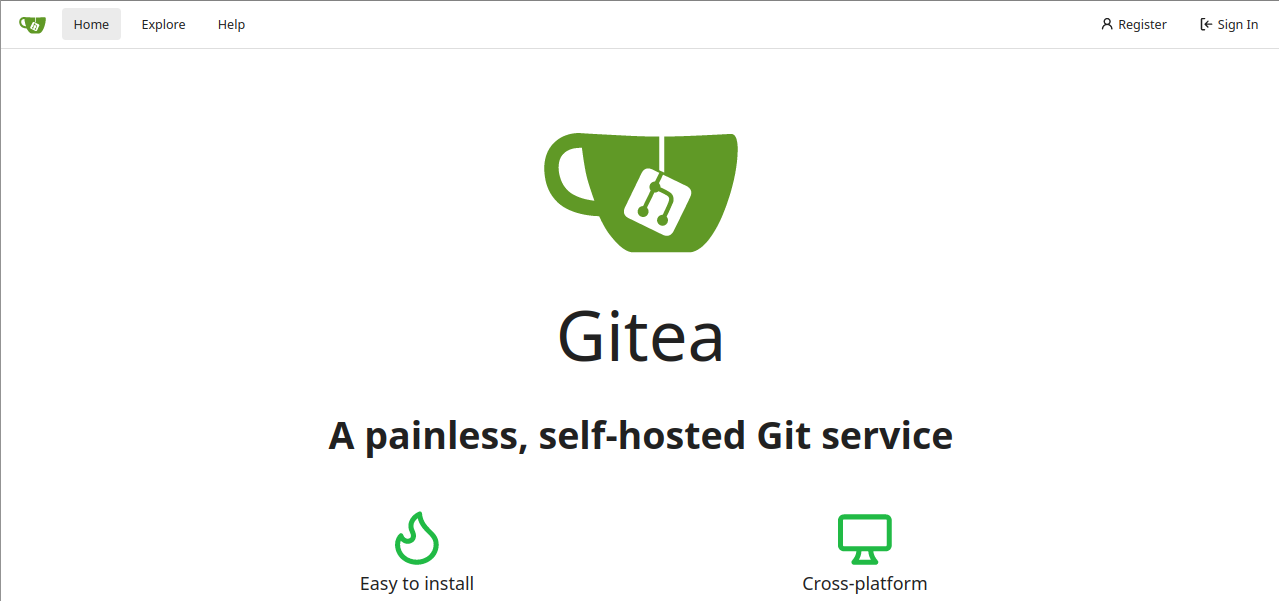
So based on this, anyone can register for an account at your service. The side effect is that any new account has automatic admin priviledges upon creation, which is described here. If you want to disable signups, you would set this attribute in the etc/gitea/app.ini according to this link
...
[service]
...
DISABLE_REGISTRATION = true
...